
Creating your own UGC (User-Generated Content) accessories is one of the coolest ways to leave your mark in the Roblox universe — and yes, you can totally do it with Blender + Roblox Studio.
Whether you’re aiming to sell on the marketplace, customize your avatar, or just have fun learning 3D art, this guide will walk you through every step.
Let’s turn your creativity into something wearable! 🎨💥
🧠 What Is UGC on Roblox?
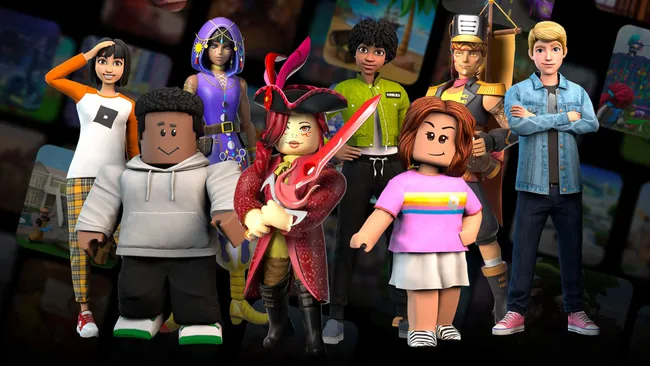
UGC stands for User-Generated Content — items like hats, glasses, hair, and other accessories created by Roblox users (not just Roblox Corporation).
Since late 2023, any user can submit UGC items through the Marketplace if they meet the guidelines.
✅ Wearable on avatars
✅ Sellable for Robux
✅ Fully 3D and customizable
📏 Requirements for UGC Accessories
Before modeling, make sure your accessory follows these basic rules:
| Category | Limits |
|---|---|
| File Type | .FBX or .OBJ |
| Polygon Count | Under 10,000 triangles |
| Texture Size | Max 1024×1024 pixels |
| File Size | Max 5MB |
| Origin Point | Centered at (0, 0, 0) |
| Scale | Fit within the avatar template |
🧰 Tools You’ll Need
- 🌀 Blender (Free 3D modeling tool)
- 🧱 Roblox Studio
- 🧢 UGC Template (Accessory Base Rig)
Optional:
- 🖼 Image editor (for creating textures)
✍️ Step-by-Step: Modeling Your Accessory in Blender
1. Open the Template
- Import the UGC head rig into Blender
- This helps align your accessory with Roblox avatars
2. Start Modeling
- Use cubes, spheres, or sculpting tools to shape your hat, glasses, or accessory
- Stay low-poly! Under 10k triangles is best
3. UV Unwrap Your Mesh
- Select your object, press
U > Smart UV Project - This allows you to add a texture image later
4. Apply Materials
- Add a base color or image texture using the Shader Editor
- Keep it simple and readable in small size
5. Export as .FBX or .OBJ
- Use File > Export > FBX (.fbx)
- Important: Apply transforms and select only your mesh!
🚀 Importing into Roblox Studio
- Open Roblox Studio and a blank Baseplate
- Insert a MeshPart
- In the Properties panel, click the MeshId folder icon
- Upload your exported
.fbxor.objfile - Set Anchored = true and CanCollide = false
✅ Tip: Use SurfaceAppearance to apply your custom texture
🧪 Testing on Your Avatar
- Go to the Avatar Editor plugin or upload the mesh to a dummy model
- Adjust position and scale as needed
- Test different animations to ensure the item moves correctly
💡 Tips for Getting Approved in the UGC Program
- Stay original: don’t copy existing items
- Keep it clean, readable, and low-poly
- Make sure it fits and moves well with the avatar
- Avoid logos or IPs you don’t own
✅ Keep everything within the head/torso bounds
✅ Test on both R6 and R15 avatars if possible
🌐 Useful Resources
📘 Tutorials
- “Blender to Roblox: UGC Tutorial” by Tarabyte (YouTube)
- “Making Hats in Blender for Roblox” by Polymorphic Studio
🛠 Plugins
- Avatar Importer – Quickly add dummies and rigs
- SurfaceAppearance Helper – Apply PBR textures easily
🧑🤝🧑 Discord Communities
- Blender for Roblox
- UGC Creators Hub
- HiddenDevs
🧠 Final Thoughts
Creating your own UGC items isn’t just fun — it’s a real career path on Roblox in 2025. With Blender and a bit of practice, you can turn your ideas into wearable art, and maybe even earn some Robux doing it.
Start small, practice often, and don’t be afraid to share your creations with the community.
✨ Your first hat might not be perfect — but your tenth? That could go viral.
🔗 Related Posts:
- 🎨 Ultimate Guide to Learning Modeling 3D on Roblox
- 💸 Roblox: How to Make Money and Robux with Your Game
- ⚙️ Roblox Studio: Powerful Free Plugins to Help You Develop
Read this Next:
1 Roblox: How to Earn Free Robux and Skins!
2 The Highest Expensive Items Ever Sold in Roblox
3 Top 10 Most Popular Roblox Games of All Time
4 Arise Crossover Codes (April 2025) – All Codes for Free Rewards!
5 The Truth About Richest Roblox Players and How They Got Rich
Roblox
Roblox is an online game platform and game creation system developed by Roblox Corporation that allows users to program and play games created by themselves or other users.

© YourCoinBlox. Not to be reproduced with
6 thoughts on “How to Make UGC Accessories with Blender and Roblox Studio (2025)”
Howdy folks! Giving bet118 a try. Heard it’s got some good offers. Wish me luck, and maybe I’ll see you raking in the dough! Find it here: bet118
I recently tried my luck at 8855bet9. They have a responsive customer support and wide games. It’s a decent platform for all kinds of players! 8855bet9
Been looking for the safest place to grab the latest 188bet app. Found 188betappdownload. Has anybody used this site before? Tell me your experiences or go check them out at 188betappdownload.
Yo, awin68 is legit! Good selection of games and the site layout is clean. I’d recommend it if you’re looking for a reliable spot to wager. Hit up awin68
Gave febet1 a try. Nice interface. So much possibility. febet1, all the best!
Wow, this site is amazing! b888888betcomvn’s got it all. Don’t miss out and try this site. b888888betcomvn